")


This post is week 2 of my 4-part blog series over The 4 Pillars of Your Pinterest Strategy with images! Learn the best practices when it comes to images used on Pinterest, plus how to create scroll-stopping visuals for your Pinterest marketing. I’ll finish out with my must-have tools for creating images to use on Pinterest and what to consider before hitting “publish” on your next Pin.
Images are a pillar in your Pinterest foundation because Pinterest is a visual search engine! And, as a business marketing your brand on the platform, you need to have images that not only are clear and concise for your audience, but also for Pinterest.
Pinterest Keywords and Images
Last week, I covered keywords on Pinterest and how doing your keyword research will help you optimize your account for the search engine. We call this SEO (search engine optimization).
Understanding keywords and knowing the keywords you want to rank for on the platform will be important before moving into creating amazing images for your Pinterest account. If you need to learn more about keywords on Pinterest, you can read this blog post!
The Basics of Creating Pin Images on Pinterest
When you go to create a Pin on your Pinterest account, you’ll have the following options come up:
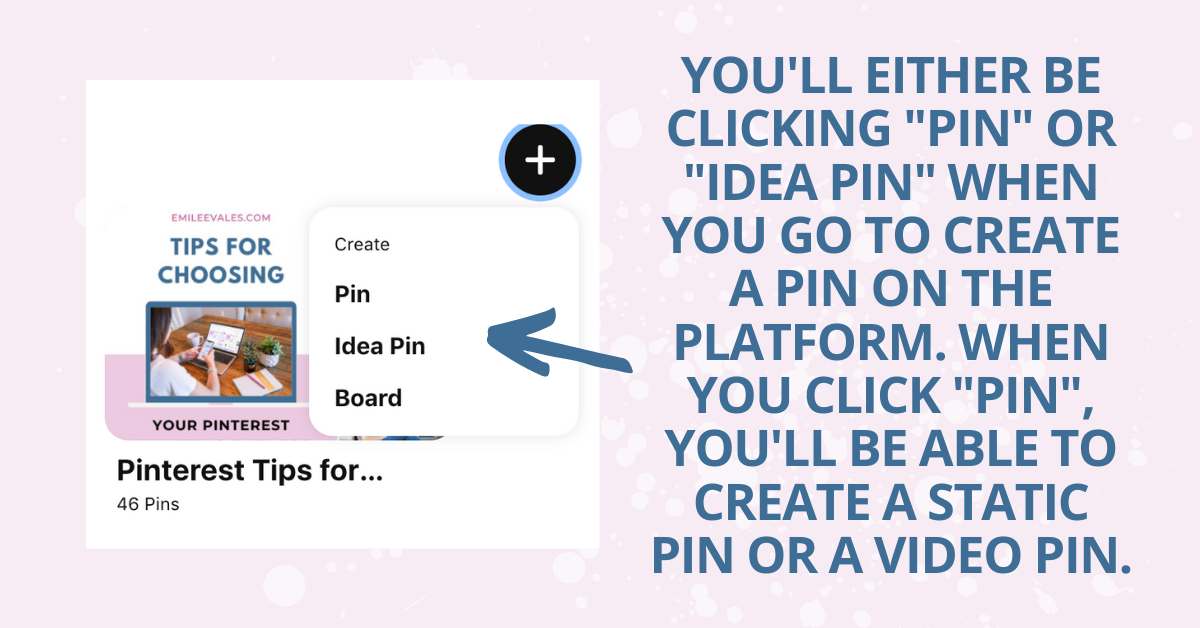
The main types of Pin designs I’m creating for my clients are what we see above: Standard (or Static) Pins, Video Pins, and Idea Pins. There are also Carousel Pins, Products Pins, etc. But we’re just focusing on these 3 types of Pin formats today.
I’ll share a breakdown of each of these formats, but I wanted to share what Pinterest also provides on their website in regards to creative best practices with Pins, and it’s super helpful!
Now here’s a quick breakdown of each:
The Standard Pin
What I also like to refer to as the Static Pin. It’s the basic Pin format we’re all the most familiar with on the platform. I use a ratio of 2:3, or 1000×1500.
The Video Pin
Exactly what it sounds like. It’s a Pin that contains video content! For my clients, I do format the Video Pins very similar to Standard Pins. I use a 2:3 ratio, 1000×1500. I have tested square video before, but I like to keep it vertical, which is really what we’re used to seeing on Pinterest. In the past, I had heard other Pinterest creators mention they tried square video because they thought it took up more real estate. But Pinterest recommends sticking with the standard ratio so it doesn’t negatively impact the Pin.
Idea Pins
The wild card. Not only are they the newest Pin format, but out of the Pin formats I’ve mentioned, they’re also the only Pin format that you cannot use an outbound link. Idea Pins are multi-pages, and for their size, they are 9×16. If you were creating an Idea Pin in Canva, you could use 1080 X 1920 pixels.
If you feel totally lost when it comes to Idea Pins, you aren’t alone. You can check out this blog post if you’d like a more in-depth overview of Idea Pins, or I have my Idea Pin Starter Kit, which will be your one-stop-shop for Idea Pin success!
How to Create a Scroll-Stopping Pin Image
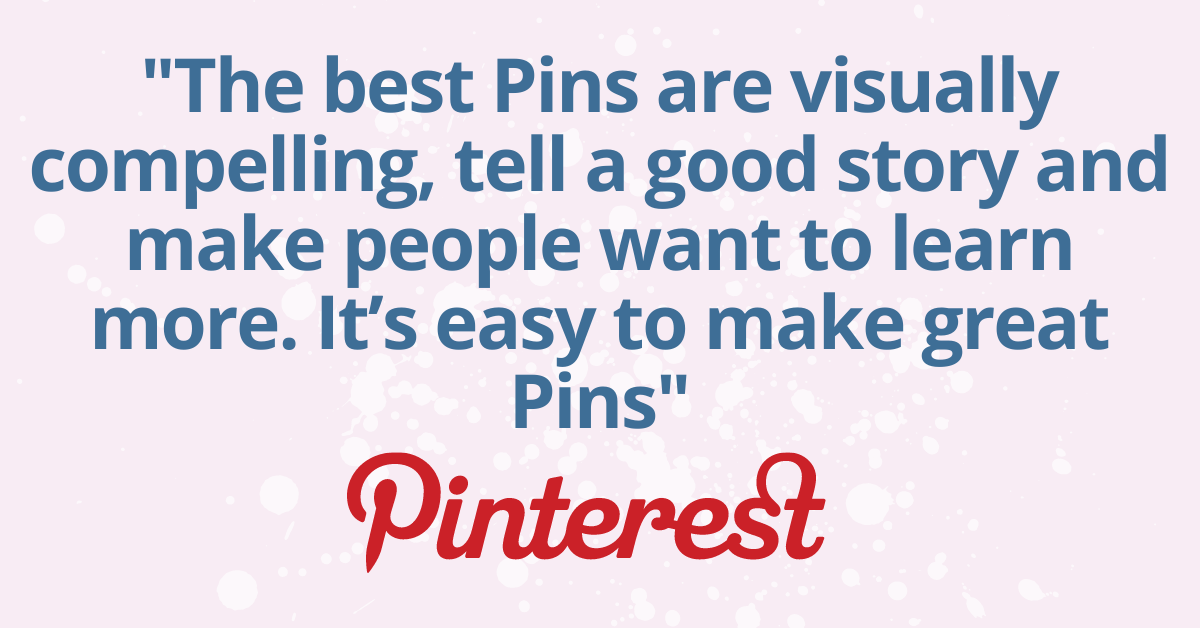
I love this quote from Pinterest. It summarizes perfectly what you need to do to capture your person visually on the Platform. However, there’s one step that actually comes BEFORE capturing them visually, and that’s thinking about what your audience is entering into the search bar, aka the keywords!
So we’ll say for now that you’ve already done your keyword research, which means you can use that information when designing your Pins. Now you just need to use the keywords in a captivating way. You want your Pin images to contain your keywords strategically so you can:
- Resonate with your audience on Pinterest and inspire them to click.
- Give information to Pinterest, which helps them understand what your content is about and who to show it to.
Here’s a diagram of what an optimized Pin should contain:

I do want to mention that you should think of the text overlay as a hook! Thinking about it as a hook will help you think of a more juicy way to entice people to click on your Pin. More clicks mean more traffic, and more traffic means more conversion!
When I say to entice them, I do want you to give them exactly what you’re promising. So whatever the text overlay says, you should deliver exactly that when they leave the platform to visit the link you’re sharing.
Here’s a fun video I created on hooks to use on your Pinterest Pins and here’s one for some CTA ideas for your Pinterest Pins!
Pro Tip: When you’re doing your research, pay attention to what type of Pin images are showing up in your search results and what other content creators are doing that’s working well for them.
Am I recommending that you copy? Of course not, but others’ content might inspire you and it can also give you ideas for what you’re seeing repeatedly.
Maybe you could test to see if it helps your content stand out. I’d like to think of this more as market research.
Tools for Creating Your Pins Images or Designs
Now that we know what your Pin should contain, it’s time to start making your Pins! There are two different suggestions I want to share. I could make more suggestions, but these are what I default to.
I use Canva to create all of my own Pins, as well as the Pins I’m creating for my clients. It’s user-friendly and will help you easily create beautiful Pins.
Pinterest Design Tool #1: Canva
There are a lot of Pin templates already on Pinterest, but I would recommend also trying to make some of your own designs. Another option is having someone on your team make some unique Pins. I say this because everyone else who uses Canva has access to the same Pin templates. So you just want to make sure you’re creating unique designs… especially since Pinterest thrives on FRESH content.
The same goes for the stock images in Canva. I’m not saying they don’t have some great images, but be cognizant that once again, you aren’t the only one selecting from that stock library.
I do find Pins that have a unique brand, product, and resources images tend to be more captivating and tend to perform better than stock content. I’m not suggesting that you never use stock photos, but I would just recommend also having some of your own content as well.
Pinterest Design Tool #2: Tailwind
It is a newer feature, but Tailwind does have a really cool feature called Tailwind Create. This is a way to generate multiple different Pin designs and you can make them branded by entering in your fonts, hex codes, logos, images, etc. within Tailwind.
I’ve played around with it a little bit and I’ve even used some for my personal account. I will say, I’ve noticed that the Pins I’ve made myself perform better. I do think it could be beneficial to test out for your account and it would for sure add variety!
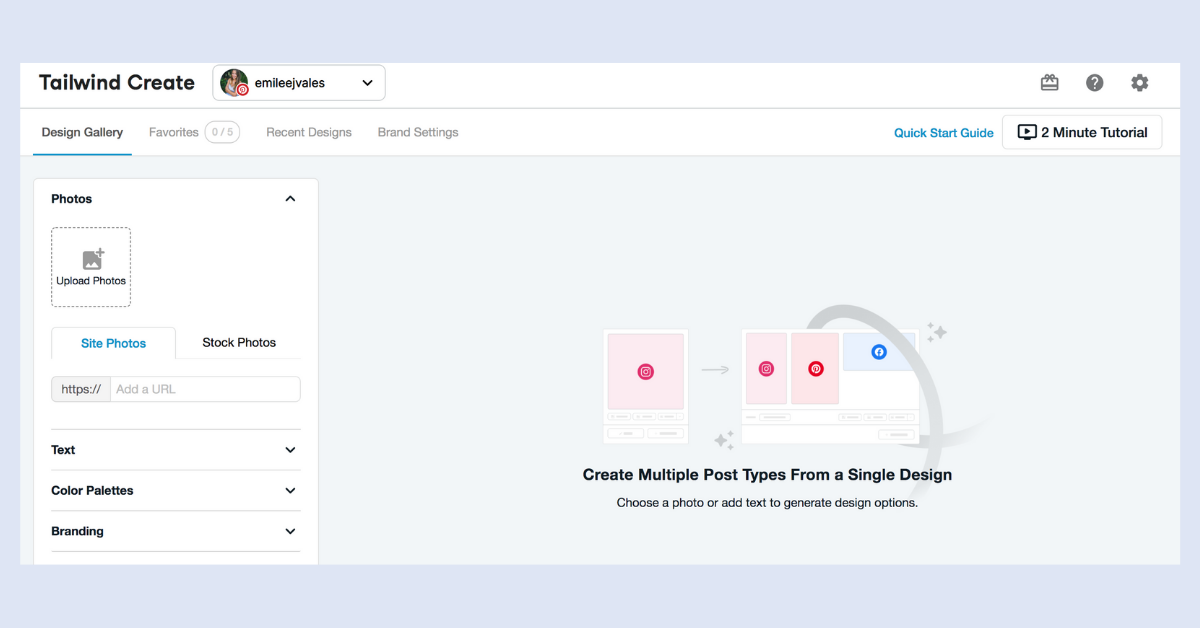
This is what it looks like on the backend within Tailwind Create. I should mention, there are limitations to how many Pins you can create monthly depending on your Tailwind account and your subscription type.
If you want to get started, Tailwind does have lots of helpful tutorials.
Before You Hit “Publish” on a Pin
Today I wanted to spend time really talking about how to create scroll-stopping Pins. But I also want to state 3 very important parts of the Pin creation process. These features need to be optimized before you’re ready to publish:
- Pin Title: I discussed last week that optimizing the Pin Title was one of the places that you need to include keywords. The Pin Title can be up to 100 characters long and should be optimized.
- Pin Description: Once again, use your keywords here! Provide context about what the Pinner will receive when they click on your content. Make your descriptions enticing, and captivating, and don’t keyword dump. Write your descriptions filled with rich keywords but in a natural way. You can include up to 500 characters here, but Pinterest recommends avoiding fluff.
- Direct Link: If you’re creating a Standard Pin or a Video Pin, make sure that you are including a link that goes exactly to where you’re promising it will go in your Pin designs! Pinners hate clicking on something and not receiving what they were promised. It feels spammy! EW.
That’s A Wrap
Okay, friend, that’s all I have for you today on Pinterest images. Just as a quick recap, create clear, actionable, and inspiring Pin images! Use a call to action and a great hook to get Pinterest users to click on your content!
Use keywords in your images so you can connect with the right audience you are catering to. This also gives Pinterest more information about who your ideal person is on Pinterest!
If you’re dying to learn more about Pinterest, you can click here to get your FREE Pinterest strategy guide or you can learn how to blow up (in a good way!) your Pinterest with my signature course, Pinterest Marketing Magic!
")


")